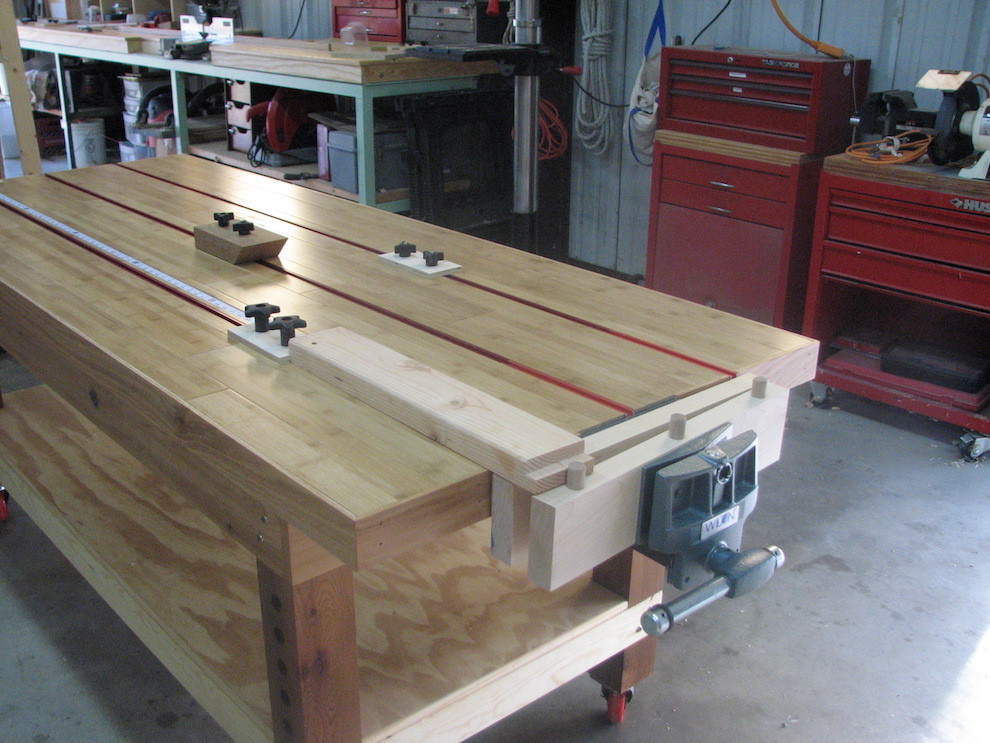
The workbench was constructed from cedar 4x4" legs and pine laterals. The top is a 2" solid core door that was covered with leftover 5/8" bamboo flooring. Three t-tracks were inset into the bamboo. Cars running in the tracks act as stops for clamping projects between them and the end-vise pegs. I inset a Starrett tape next to one track Not shown are short I-beams that can also be placed across the bench in the tracks and act as “sawhorses” to work above the bench. The holes drilled in one leg hold pegs to help hold long pieces that are in the small front vise.
Beyond the vise is a green metal table equipped with a plywood top for the sliding miter saw. It also has a measuring tape inset along with stops for repetitive cuts.
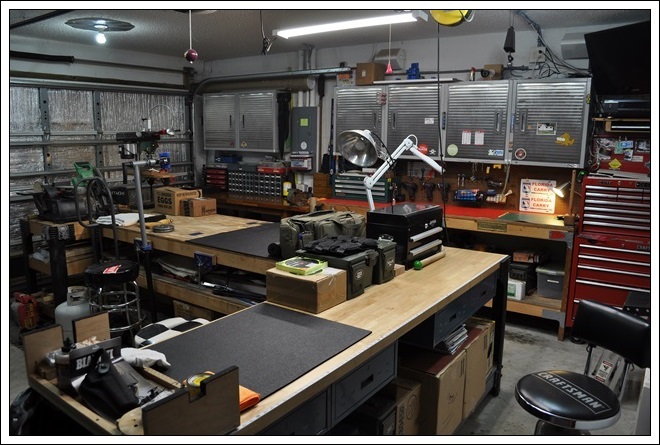
Back wall: 3 benches, scraps from various projects. The red topped bench is actually 2 benches joined w/ plywood. The ‘fastener’ bench is topped with a solid wood door given to me by a co-worker. A beast of a bench!
Foreground: 3 benches, 2 full 8 footers and a custom designed 4 foot end bench for my sander, drill press, and chop saw.
Some of these workbenches are straight up arousing. I like the idea of the architect’s lamp in Jeff’s post. They seem pretty expensive but I can see their utility during finishing. I also love Graham’s idea of the paper roll. My workbench is also a work in progress. It started as an “Ultimate Tool Bench” and has recently been modified. I am having fits with the vise, but I’ll figure it out. Not able to upload my image now as it is 3.8 megs. Will try to figure it out.
Not quite, but I have popped into the garage more than once just to bask in it’s glory. When I see it clean, I can’t help but smile at the potential it has realized, and the potential it will manifest in the future. It’s looking much more workish right now though, as a cubby cabinet that goes under the rear slab is on top, in the midst of being built.
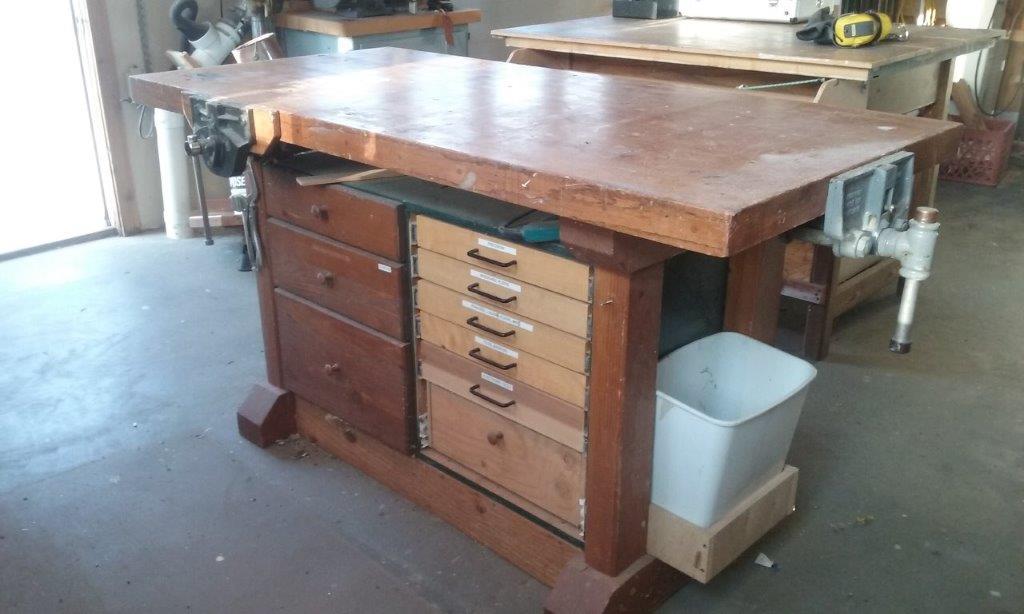
My bench is one of the first shop accessories I built… almost 20 years ago in fact. Its a massive heavy trestle base slab with built in vices and tool storage below. The top is a sandwich of hardboard top and bottom over 4 plies of high density particle board edges in hardwood. I’d guess the top alone is over a hundred pounds. The top sits on a trestle base constructed of laminate 2x lumber. There is a 4" space between the top and the tool cabinet below allowing me to pass long clamps under the top to clamp items to the workbench edge. I love the bench. The top is cheap enough that I don’t fret the occasional hole drilled in it or screw driven in it. I simply fill all the holes with bondo every few years, sand the top flush and refinish. Once, about five years ago, I noticed the middle of the top had an 1/8" sag (probably there since the original glue up) and since I wanted to use the bench to build my perfectly flat torsion box design base for my CNC I decided to flatten the workbench. I clamped heavy angle iron to each side and used more angle iron to build a sliding sled which guided a router to flush cut the entire surface dead flat. It worked well and the restored top has remained stable ever since.
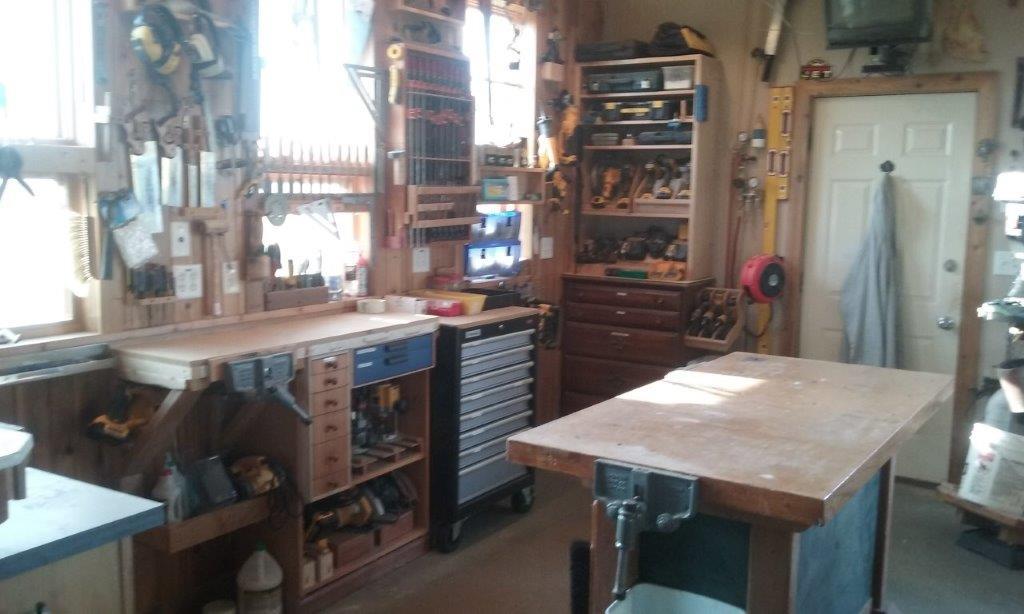
For the base, I’ve slowly been replacing the cheap original drawers with nicer full extension smaller drawers. I’ve found that the more shallower drawers are better the fewer deeper drawers on the same principle as a tool chest. Oh, I’ve evolved my bench use to go with a back bench to hold the tools used on the front bench. I’ll post a picture of that too in the future. I hope you like them. Chad